I’ve been doing more knitting than quilting in the past year, so when my friend suggested we do Project 48 together I thought it sounded like fun. I’ve only done one mystery quilt before. Part of me loves them, but the anally retentive part of me doesn’t. Loss of control! How can I choose fabrics when I don’t know what’s coming! However the idea of 1) how fun it would be doing the blocks along with a friend (like the quilt-a-long I did last year) plus 2) getting the rust off my quilting skills and having a reason to do different sorts of block I might not have otherwise do won on the day.
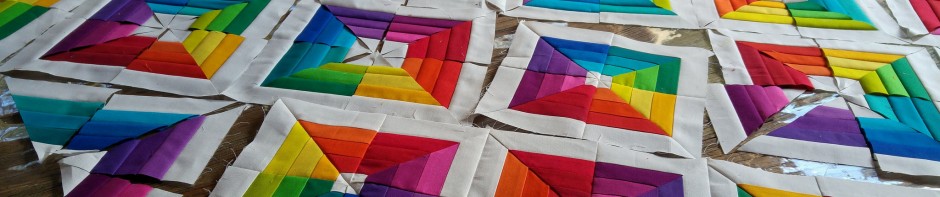
The first block was released yesterday. I’ve decided that for this quilt I’ll stash dive (i.e. use fabrics already in my stash). To satisfy my anal-retentive-colour-freakishness I’ll give each block a dominant colour from the rainbow with plain white as the ‘background’. So there will probably be 8 blocks centred around 6 different colours. There is a block released each week, and each month the blocks have a different theme. The first month’s block theme is ‘nine patch’, and it will be interesting to see how the different designers interpret the different themes.
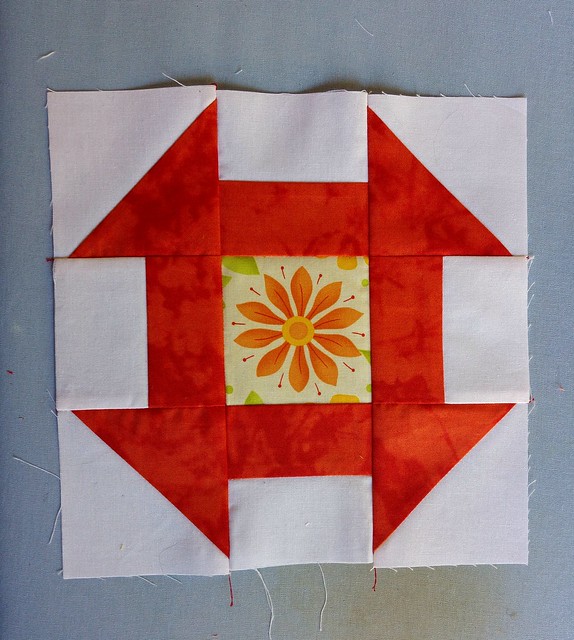
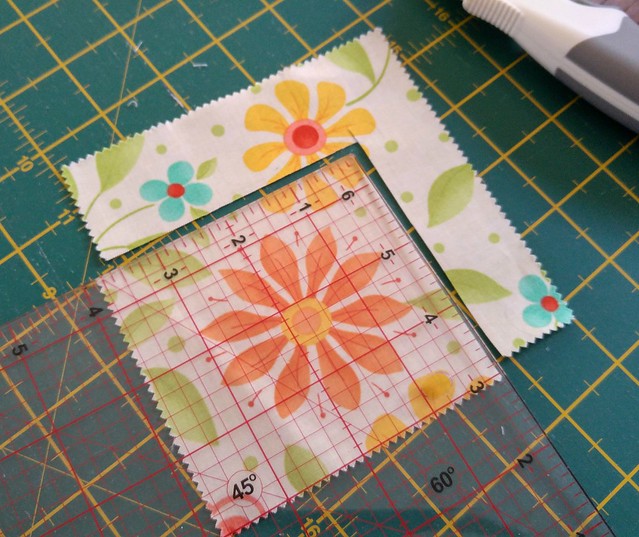
I don’t like orange, so I decided to make the dominant colour for the 1st block orange to kinda get one out of the way. I don’t usually like doing fussy cutting as it can waste fabric and my anal retentiveness doesn’t like that, but I thought why not! I chose a charm pack square to fussy cut the centre block. As I’m very fussy indeed, for the 3 1/2 block I put the ruler’s 1.75 inch measurement in the centre of the flower.
My friend doesn’t have as much experience with half square triangles (HSTs), so while I put my block together I took a lot of photos. To start off my HSTs, first I drew a diagonal line through one of my 4 inch blocks with pencil. If you are using a fabric with a definite front and back, this must be done on the back. There are other methods people use without marking the back (these are especially useful if you’re doing a gazillion HSTs), but I might leave that for another time. For this block you only need to mark 2 squares, so it’s not time consuming.
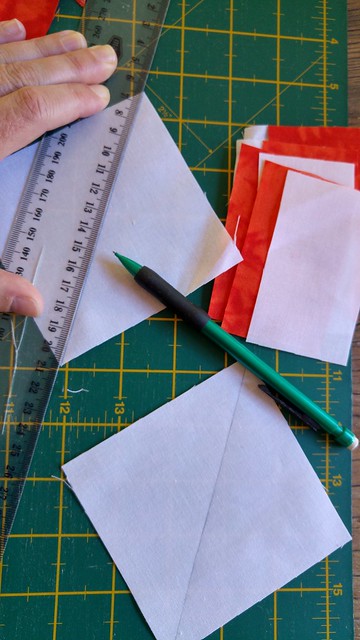
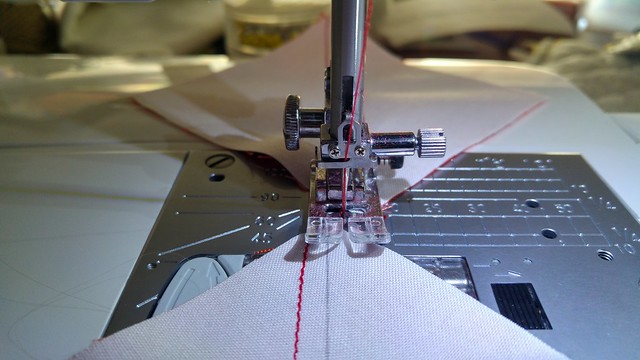
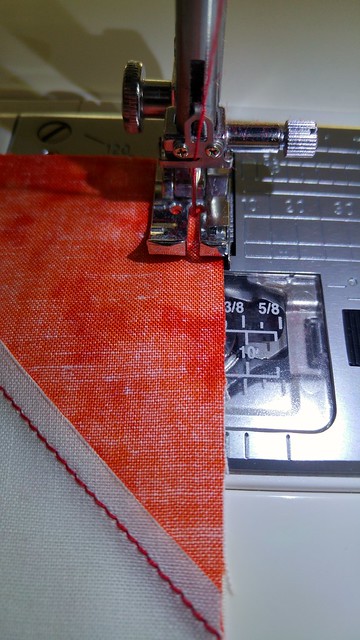
Now with 2 squares of fabric face together, sew a scant 1/4 seam on each side of the diagonal line. You can’t use a 1/4 inch guide foot for this as it pushes down the fabric since it’s designed to run next to the edges of fabric, so measure where 1/4 inch is on your main foot. When you are sewing a lot of small things, i.e. quilting, I find it useful to do it in a ‘chain’, i.e. don’t cut the threads between pieces. In fact, before I sew my 1st piece I often sew through an off cut selvage or something. This will help it feed better and ensure the 1st little corner isn’t sunk into the machine. (My seam really isn’t perfect here; it’s been too long since I did any sewing!) Once you’ve sewed all the pieces, you can easily snip them apart.
After sewing 1/4 seams on both side of the diagonal line, cut along the diagonal line. If you are very anal retentive indeed, press the seams down before you do this. Wow, my seams are terrible! I’ve forgotten how to sew a straight line. Perhaps I should have had coffee BEFORE sewing this morning.
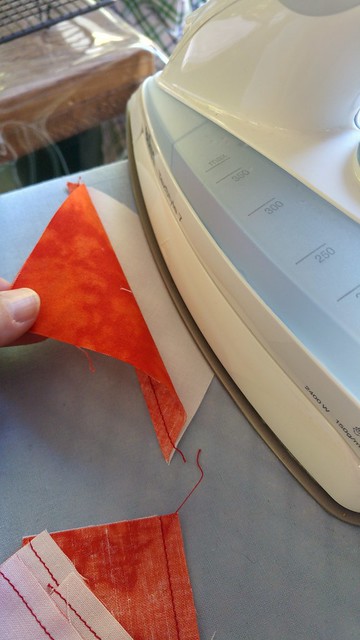
Press the HST open towards the dark side, i.e. the seam will be folded towards the darker colour. This helps prevent the fabric behind showing through the lighter colour.
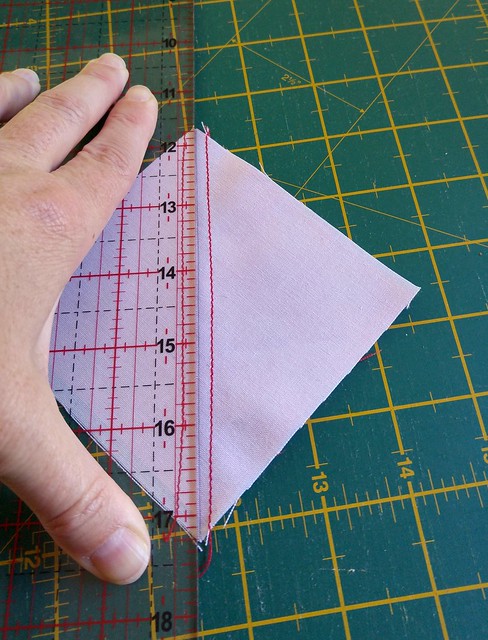
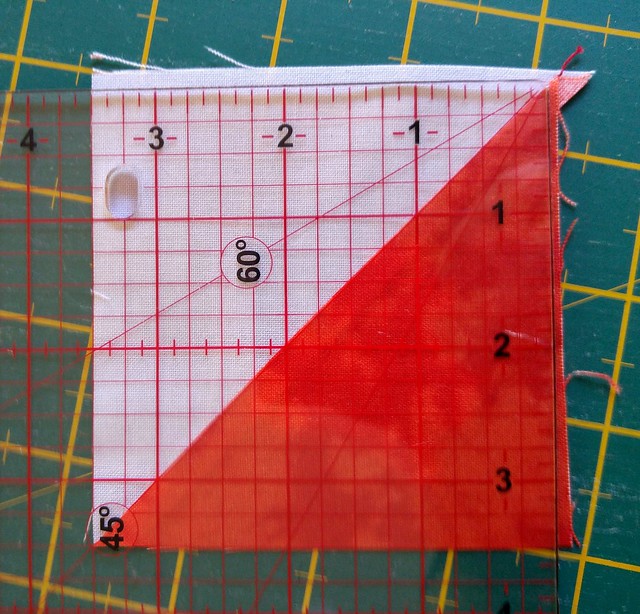
Now you’re ready to start trimming the HST. Note that the square is slightly larger than the finished size, 3 1/2 inches. Also note that it’s more important to line up the diagonal seam on the 45 degree angle than to line up the edges of the fabric to the ruler.
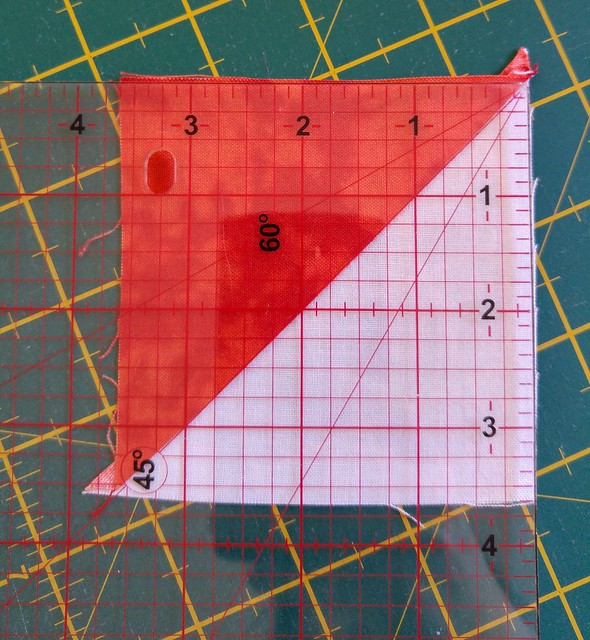
Turn the square around, line up the edges to the correct measurement (3 1/2 inches in this case) and the diagonal along the 45 degree marking, and make the final trims to your square.
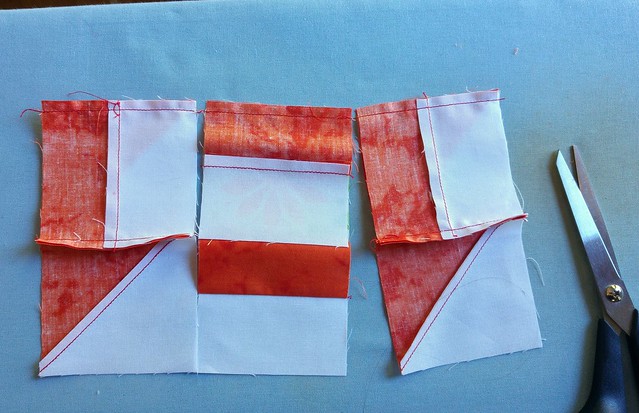
Once I’d also sewn together the four 1/2 and 1/2 pieces, I was ready to put the block together.
First I sewed columns together.
As before, I ‘chained’ them together and cut them apart when I was finished.
Once I had the columns together, I thought about how I wanted to press the seams. The important thing about this is when I sew the rows together, I want the seam where the different pieces meet to be pressed in the opposite direction. If you do this they will lock or nest together, i.e. the bulk of the fabric will be balanced where 4 pieces meet. If you don’t do this there will be a lot of fabric stacked on one side of where 4 pieces meet and hardly any on the other side and the join won’t be neat.
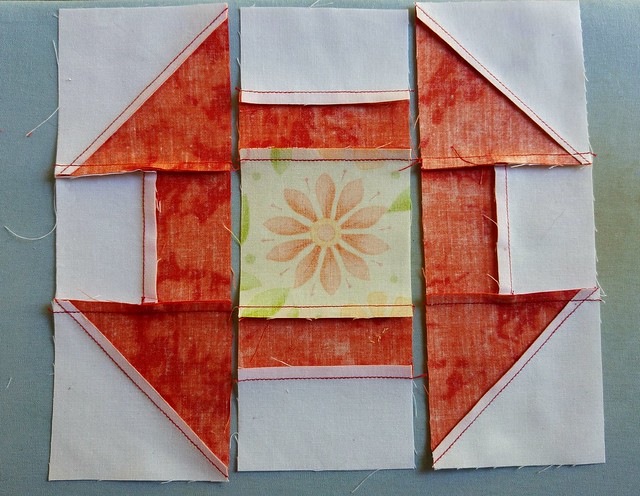
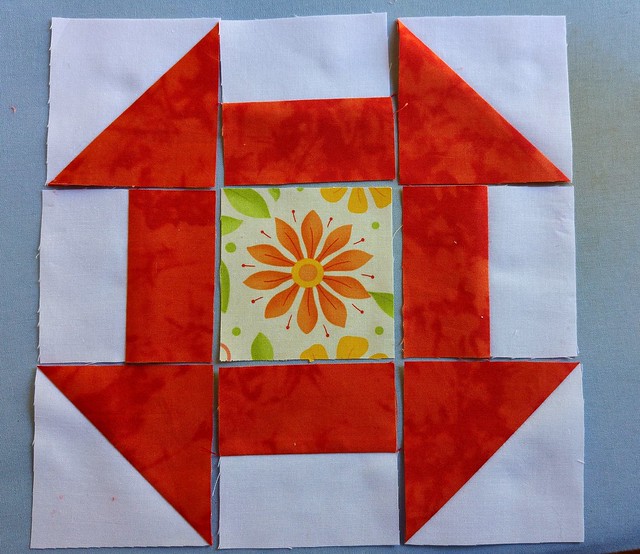
Not perfect, but finished! And very orange.